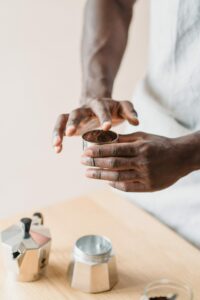
How to Make Coffee with a Moka Pot
Whether you are nostalgic for an Italian coffee experience or enjoy a rich tasting caffeine kick, the moka pot is a convenient and easy to use coffee maker that will brew a well rounded cup of coffee if handled correctly. Invented in 1933 by the Italian engineer Alfonso Bialetti, the moka pot quickly caught the attention of people across Italy. Due to its affordability and simplicity, it is widely used to this day – making stovetop coffee is a favorite morning routine all over Europe. If you are wondering how to make coffee in a moka pot, look no further! In this comprehensive guide, I will pull back the curtain, providing you with insider tips and techniques, delivering the perfect Moka Pot brew.
This article contains affiliate links to Amazon. As an Amazon Associate I earn from qualifying purchases.
I first got introduced to the moka pot while spending a year abroad in Rome, when my Italian housemates would fill the whole apartment with the smell of freshly brewed coffee in the morning. To date this is my favourite way to wake up! It is important to note that burning your coffee or extracting bitterness are common issues when brewing with a moka pot. Over the years, I learned a few tricks to make sure that the delicious aromas are accompanied by equally great taste. But before we dive into the how-to’s of mastering the moka pot, let’s start by preparing ourselves for the perfect brew.
Moka Pot Steel vs. Aluminum
Steel vs. aluminum, which one is the best moka pot? If you happen to own an induction stove, a stainless steel moka pot like the Bialetti Venus is your best option. A moka pot made of steel is generally considered to be more durable and has a longer lifespan. Steel is also a better heat conductor, so a steel moka pot can heat up faster and more evenly.
Stovetop coffee makers made of aluminium, such as the Bialetti Mokka Express, will only work with induction if you put a pan underneath. They are typically lightweight and more affordable. For fans of the eight-sided classic look, Bialetti have designed a moka pot especially for induction with the same vintage feel.
Moka Pot Sizes
Moka pots come in all shapes and sizes. Moka pot sizes are expressed in the number of cups it produces but depending on the model the capacity in ounces can vary. Here are some general guidelines on what to look for when comparing models:
- The 1 cup moka pot has a capacity of 2 oz and will produce one espresso-style or lungo-style coffee for one person. It is ideal for a single household.
- Most 2 cup stovetop coffee makers equal 3.38 oz and produce two espresso-style coffees. Perfect for sharing with that special person in your life.
- Other common sizes are 3 cups ranging from 4.3 to 5 oz, 6 cups ranging from 9.2 to 10 oz and 9 cups ranging from 14 to 15.2 oz. They are suitable for small to large families or people who like to brew a delicious cup of coffee for multiple guests.
- 12 cups is the largest size I’ve come across. It’s capacity equals 22 oz and is perfect for commercial use or for large gatherings.
How Does a Moka Pot Work?
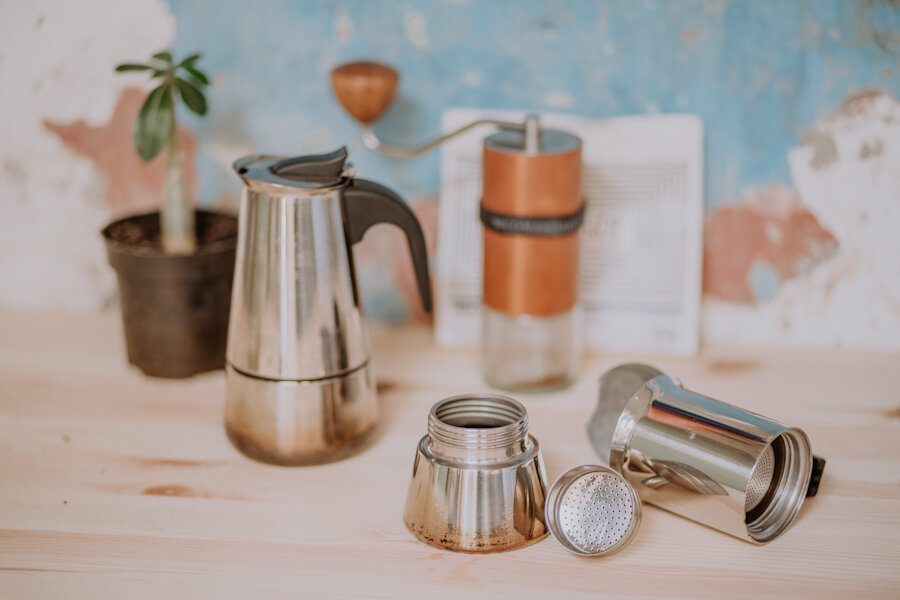
The bottom chamber of your moka pot is where you put the water, the middle filter basket is where you put the coffee grounds, and the top chamber is where the brewed elixir of life, coffee, comes out. The water in the bottom chamber is heated and the steam created by this heating forces the water up through the coffee grounds in the middle filter basket and into the top chamber where it can be poured into your waiting cup.
Prep for the Perfect Stovetop Coffee
Making coffee in a moka pot requires some preparation. Ensure all removable pieces of your brewing device are clean to avoid any unwanted flavors. The main parts of a moka pot include: a knob, lid, small column, coffee collector, handle, filter plate, gasket, funnel, heating vessel, and release valve. On a little side note, double check that gasket (which can come loose if you use your moka pot long enough) and all other parts are in the right place. My moka pot exploded in the kitchen once and I had to repaint the walls. True story.
What is The Best Grind Size For a Moka Pot?
Without wanting to sound like a broken record, I always recommend freshly grinding your beans before brewing. There’s a helpful post reviewing the best hand coffee grinders up on my blog. When you’re ready to fill your moka pot with coffee, it’s important to choose the appropriate grind setting. To clear the air, although the moka pot is also referred to as Italian espresso maker or stovetop espresso maker, it is impossible to prepare true espresso with it. You’d need 9 bars of pressure to create a thick crema on top, whereas the moka coffee is extracted with only 1.5 bars of pressure. To find the right moka pot grind size, don’t grind your coffee as fine as you would for espresso to avoid overextraction and clogging the filter screen. An espresso grind is too fine for the moka pot. I use a Comandante grinder and choose a grind setting between espresso and drip coffee, which translates to 15-20 clicks. If your coffee tastes bitter, try to grind even coarser.
What is the Best Coffee For the Moka Pot?
As a rule of thumb, the best coffee for moka pot is the coffee you like. But if you’re asking yourself what kind of coffee is ideal to use in a moka pot, it is important to understand that it over-extracts by design and therefore tends to highlight undesirable bitterness. Therefore, medium to medium-dark roasts are more suitable than a dark roast when brewing with the moka pot. After experimenting with all kinds of roast levels I achieved the best results with medium roasted coffees from Brazil, Colombia or Guatemala. As for fruity, lightly roasted coffees from Kenya or Ethiopia, I found them to taste considerably better when brewing espresso style coffee with the AeroPress.
How to Use a Moka Pot – Step by Step Instructions
Once you set out to use your Moka pot, there are a few simple instructions you can follow to optimize the result.
1. Use a Clean Moka Pot
Great taste starts with a clean brewing device. The best practice is to clean your Moka pot thoroughly after each use, in order to prevent buildup that could lead to issues down the road. Aside from affecting operation, leftovers will negatively impact taste, with bitter flavors, and rancid oils.
2. Utilize Filtered or Bottled Water
Producing a balanced cup of coffee, requires the use of high quality, filtered or bottled water. Considering that coffee is 98% water, it’s no wonder professionals turn to clever solutions like Third Wave Water to optimize its mineral content. It goes without saying that in many parts of the world tap water is to be avoided for brewing coffee.
3. Pre-boil Your Water
Taking the time to pre-heat your water will go great lengths in improving the taste of your coffee. Aside from reducing the time the moka pot is sitting on the heat, pre-boiling your water before adding it to the chamber lessens the odds of burnt grounds and bitter tasting coffee.
4. Add Water and Coffee Ground
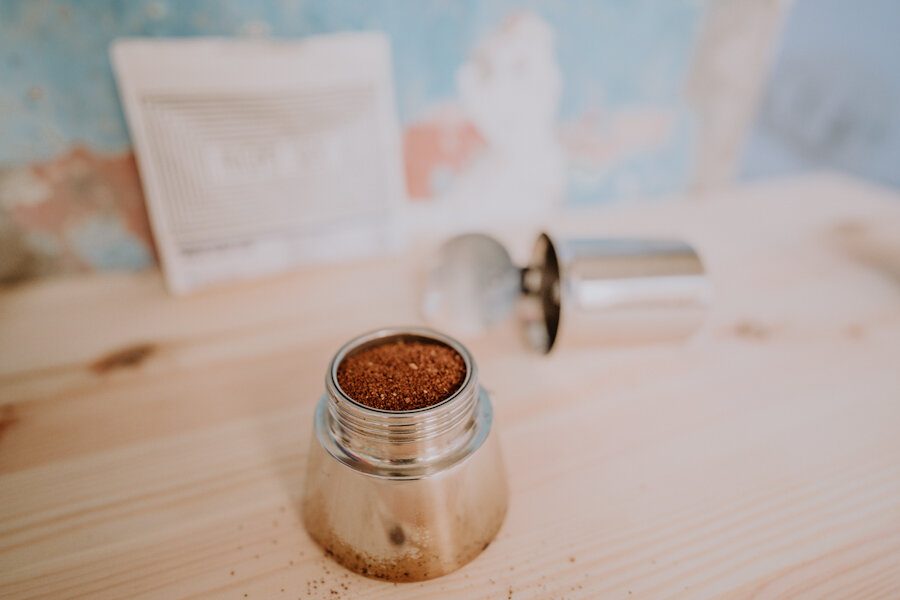
For a 3 cup moka pot, use 17 grams or 0.6 ounce of coffee and 150 milliliters or 5.3 ounce of water. Begin by filling the bottom section of your Moka pot with pre-boiled, filtered or bottled water up to underneath the valve. Add coffee grounds to your filter basket, and level off the contents. Resist the urge to press, or tamp the coffee grounds down into the basket. Additionally, avoid overfilling the basket, or building a “coffee mountain”. Creating unnecessary resistance for the water flow will increase the bitterness in your cup.
5. Brew Espresso-like Coffee
Screw the parts of the pot back together using a towel to avoid burning your hands and, with the lid open, place the moka pot over medium heat. When the coffee starts gushing out of the spout, it has a temperature of around 60 degrees Celsius, after that the temperature will rise exponentially, which results in bitterness. You can avoid this by removing the Moka pot from the heat when the coffee has filled half the vessel or, if you have a thermometer handy, when the output reaches 75 degrees Celsius. Run the base under cold tap water to stop the extraction. Don’t get distracted and leave the moka pot on the heat until you hear the gurgle to avoid a bitter ending. Give the contents a good stir before serving, and enjoy black or with milk.

The Best Moka Pot Coffee Ratio
To test out the best moka pot coffee ratio I used a 3-cup version of the Bialetti Moka Express. The first thing I checked was how much coffee grounds and water actually fit in the filter and bottom chamber. The filter can comfortably hold 17 grams or 0.6 ounce of coffee. The bottom chamber can fit 150 milliliters or 5.3 ounce of water. This translates to a coffee to water ratio of 1:9. The moka pot makes it easy for coffee lovers, because as I found out during testing, the coffee ratio is already spot on by just sticking to these filling quantities. This is great news for all those who want a quick caffeine fix without weighing every single gram of coffee or water. There is not much room for experimentation as you can’t exceed these limits, but I did try the coffee to water ratios of 1:5 and 1:7 to make sure I get the best possible coffee out of the moka pot.
When applying a brew ratio of 1:5, I was pushing the limits of what is possible as I needed to fit 18.5 grams or 6.2 ounce of coffee into the filter, whereas 92.5 milliliters or 32.6 ounce of water fell short of the manufacturer’s recommended amount by a third. You won’t get 3 cups out of this brew, but it results in a full-bodied, strong espresso-like coffee. If you need a kickstarter in the morning it might just be the right coffee ratio for you.
For the coffee to water ratio of 1:7 I was sticking to 17 grams or 0.6 ounce of coffee and adjusted the amount of water to 120 milliliters or 4.2 ounce. The result was rather underwhelming, as this coffee ratio did not succeed in highlighting the bright, juicy flavors of the coffee I used. However, depending on your choice of coffee, you might achieve better results. There’s certainly no harm in trying.
Moka Pot Accessories to Improve Your Brewing
Thermometer
There are some limitations that are inherent with any method of brewing coffee. For making stovetop coffee, this includes the difficulty of controlling the water temperature, which puts coffee lovers in a bit of a pickle. Finding that sweet spot to remove the moka pot from the heat before it starts extracting bitterness is tricky. By following the steps outlined in this article, though, you will be more likely to receive good results. If you are struggling with hitting the correct water temperature, it may be worth your while to invest in an affordable thermometer, such as the Inkbird Food Thermometer, to gain more control.
Paper Filters
While the moka pot doesn’t give much room to experiment with brewing recipes due to the limited size of the water chamber and filter, there are a few other tools available that will improve your overall moka pot experience and reduce bitterness, such as paper filters. Using a moka pot filter increases the pressure built up in the water chamber and therefore also the extraction. Furthermore, the paper filter will hold back fines and sediments which results in a cleaner cup. If your device has the size for 6 cups, you could actually use AeroPress micro filters for brewing with a moka pot. With or without an extra filter, by following the simple moka pot instructions listed here, you’ll be well on your way to enjoying a consistently delicious cup of espresso-like coffee from the comfort of your own home time and time, again.
How to Clean a Moka Pot
A clean brewing device is always essential for a good tasting cup of coffee. Fortunately, cleaning a moka pot is an easy task. It just takes a few minutes to prevent accumulated coffee oils and old grounds from ruining the flavor of your coffee with unnecessary bitterness.
First and foremost, never put your moka pot in the dishwasher as it causes oxidation and corrosion. Wait for the moka pot to cool down, then disassemble it, take out the filter basket and remove the used grounds. A little hack I learned in Italy is to briefly blow into the filter from the other side to effortlessly remove the grounds. Thoroughly rinse and dry the filter basket, upper and lower chamber, and you’re done.
